Install the Viqua S463-QL Lamp: Quick and Easy Guide
, by EVIMERO-DEV, 5 min reading time

, by EVIMERO-DEV, 5 min reading time
If you’re looking to maintain the effectiveness of your water treatment system, installing the Viqua S463-QL UV lamp is essential. This lamp plays a crucial role in providing safe and clean water by effectively eliminating harmful microorganisms. With the right installation, you can ensure that your system operates efficiently for the long term. The process is quick and straightforward, making it easy even for those with little experience in maintenance tasks. In this guide, we will walk you through the steps of installing the Viqua S463-QL lamp, troubleshooting common issues, and providing insights into the maintenance of your UV system.
UV water treatment systems like the Viqua S5Q-PA rely on ultraviolet light to disinfect water by destroying bacteria, viruses, and other pathogens. These systems are a popular choice for homeowners seeking to enhance water safety without the use of chemicals. According to the World Health Organization, UV disinfection is able to reduce up to 99.9% of pathogens, making it one of the most effective methods for ensuring potable water.
Furthermore, utilizing a UV system contributes to a more eco-friendly home by eliminating the need for chemical treatments, which can negatively impact the environment. It’s important to note that the lamp in your UV system has a lifespan of about 12 months or approximately 9,000 hours of usage. After this period, replacing the lamp, such as with the Viqua S463-QL, is crucial for maintaining the effectiveness of your water purification system.
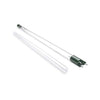
Before starting the installation of the Viqua S463-QL lamp, it's important to gather all necessary tools and materials. Typically, you will need a clean soft cloth, a screwdriver, and the installation kit which includes the lamp and quartz sleeve. Viqua makes it easier by providing full instructions in the combo kit. Ensuring you have these items on hand can streamline the installation process and help avoid any delays.
If you’re considering upgrades, you may also want to look into additional products, such as the Viqua QL-410 UV Lamp and Sleeve Kit and the Viqua Replacement QL-200 Lamp and Quartz Sleeve. These products also come with comprehensive instructions for user-friendly installations.
Installing the Viqua S463-QL UV lamp is a straightforward task. First, ensure your water system is unplugged and that the flow of water is halted to prevent any mishaps during the installation. Next, locate the access point for the lamp. This usually involves removing a few screws that hold the sterilizing chamber closed. Always keep these screws in a safe place for reassembly.
After removing the cover, gently extract the old lamp and quartz sleeve. It's important to handle these components carefully to avoid any breakage. Before installing the new Viqua S463-QL lamp, inspect the quartz sleeve for cleanliness and any visible damages. If necessary, consider replacing it using the Viqua QS-463 UV Quartz Sleeve.
Even simple installations can sometimes lead to unanticipated issues. One common challenge is ensuring that the new lamp is properly seated in the socket; failure to do so may result in flickering or no light output at all. Always double-check that the lamp is securely connected before sealing everything back up. Another common issue is leaks; if your UV unit starts leaking after installation, it may be due to worn-out O-rings or a failure to properly seal the quartz sleeve.
If you encounter a lack of disinfection performance after replacing your lamp, consider checking the power supply and ensuring the unit is receiving adequate power. Additionally, remember to check the age of your lamp, if a year has passed, it would need replacing with a fresh Viqua S463RL UV Lamp.
After successfully installing the Viqua S463-QL lamp, maintaining your UV system is crucial for its long-term efficiency. Regularly inspect the quartz sleeve for any mineral buildup, and clean it every three months to ensure that UV light can effectively penetrate the water without obstructions. If cleaning yields no results, timely replacement of the sleeve is essential.
Additionally, it’s recommended to keep a maintenance log indicating when the lamp and sleeve were replaced, along with notes on any maintenance conducted. This not only aids in keeping track of replacement times but also helps ensure consistent performance. Knowledge about related products, such as the Viqua S330RL UV Lamp, could be useful if you are managing multiple systems in your household.
Installing the Viqua S463-QL UV lamp is a manageable task that can significantly enhance the safety of your water purification system. By following the steps outlined above and adhering to regular maintenance practices, you can ensure optimal performance and extend the life of your equipment. Remember to use genuine Viqua parts to maintain quality and reliability throughout your UV system's lifespan.